Project #1
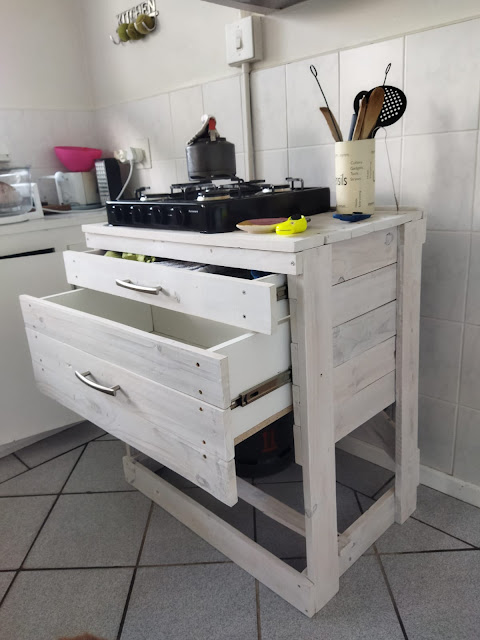
I moved into a new place at the end of January. As this house didn't have a stove, I bought a gas stove top and decided to build a cabinet, with drawers, for this to sit on. I pulled pallets from the factory, sanded the planks and turned them into this:

This is my first real furniture project and my own design complete with two drawers on full-extension runners that I got right first time. What a blessing YouTube is. I'm thankful for content creators with their how-to videos.
Using pallet planks has its pros and cons. Sanding is a lot of work and it takes a lot of time. But it is also satisfying to transform a rough plank into a smooth plank with pretty wood patterns and it can be quite meditational.
After making the trestle legs (sanding by hand), I bought an orbital sander. I recently borrowed a belt sander to give this a try - works a treat and saves time. I've got a new project planned that I'm struggling to get to but it will need to use a lot of pallet planks.
Pallet planks are also not quite uniform, not quite even and edges are not entirely straight. But this is, for me, part of the charm.
Their best feature: they're free.
Project #2 - Toy Cupboard
I really needed a cupboard for my camping gear, paddling gear and other toys. Partly to neaten my garage and use space better but also practically to make it easy to access gear to take out and put away. I am so done with crates stacked on top of each other.
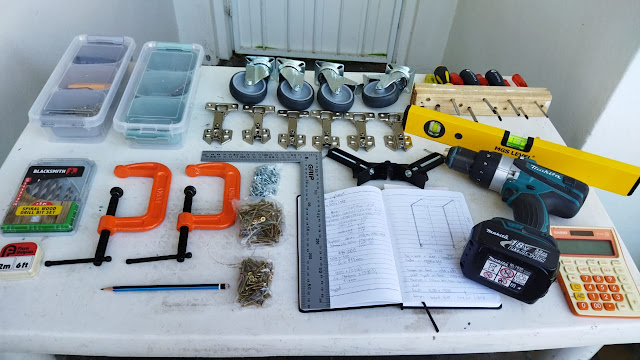
When I'm working, I don't like digging for tools. I use a 'tool table'.

For this project, I ordered wood. I drew a design, worked out the measurements and bought MFC (melamine faced chipboard) from a wood store and got them to cut the pieces to size. They also drilled the round holes for the concealed hinges.
I got the carcass built quick-quick and enjoyed using my corner clamp. I only have one so I used two clamps and a corner plate to hold the second corner.


I learned the set-square trick to check for squareness from a video on YouTube. Yes, it isn't rocket science but if you've never thought of it, then learning this neat basic is revolutionary.

I used inexpensive masonite for the backing and then got to work on hanging the doors. I was really nervous about this because I didn't want to mess it up. I watched a few videos and then got on to it.

The first one took me a long time because I lacked confidence to just drill those holes. After the first one, the rest went quickly and my doors hung beautifully.


I am into wheels. It is hard to move a heavy, fully-loaded cupboard anywhere. What if I want to rearrange my garage? I put the cupboard on wheels and pushed it into the garage. So easy. The wheels are worth every cent.

The front two wheels lock. This is actually quite a big cupboard.
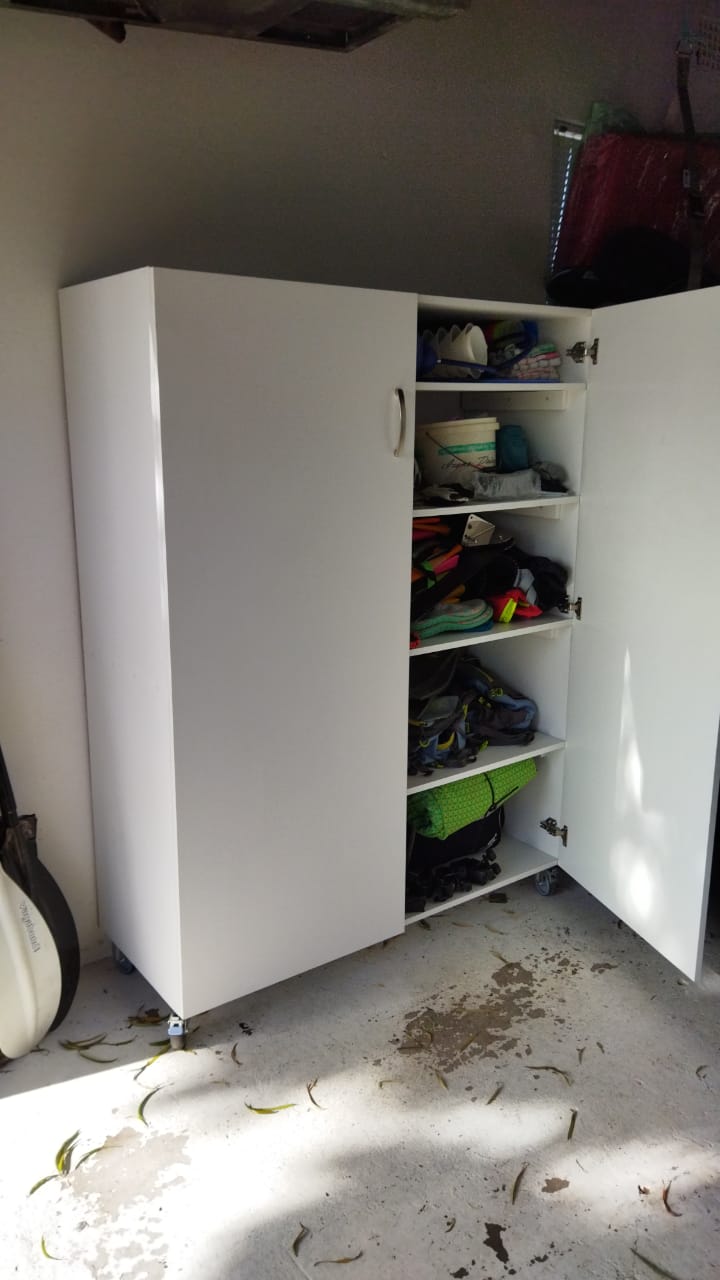 |
| I need to work on my inside-of-the-cupboard organisation. |
For the shelves, I used dowels to attach blocks of wood on which the shelves sit.
Using MFC that has been cut to size is quick and easy. No preparation required. You can just jump in with a tape measure and drill. It suits the purpose of a storage cupboard. But, this material is not inexpensive and it actually costs quite a bit just for the material to make a big cupboard.
Project #3 - Recess spice-and-jar rack
I've been drowning in guavas for weeks as a result of two prolific guava trees in my garden. I've done lot of bottling and I needed a place to store full and empty jars. The spices have been in a small box since we moved and they really deserve an easy-access space.
Behind the back door, there is a recess where dry walling is used to block off an outside loo. It was the perfect depth to use pallet planks as shelves.

These shelves are not fixed to the wall. I took advantage of the slightly wonky shape of pallet planks to create forces and tension that presses the side planks against the walls. It can't fall over and will take effort to pull out. The shelves sit on blocks of wood that are connected to the side planks using dowels. To keep the shelves in place I used dowels for these too.
The spice shelf has a front and is angled to show the spice bottles, which have labels on their lids.

I did buy a water-soluble white enamel for this project, which I'll be sure to use again soon. The wood was free and time spent on this was a pleasure. I have decided that I'm not crazy about the painting part of the project. It takes time waiting for paint to dry with doing a primer and then the real paint. When just doing assembly, a project can be completed in a few hours. With sanding and painting and cutting and measuring, it can take a few weekends to complete a project.
Project #4
Project 4 will be what I call a cupboard-cupboard. It will go in the bottom half of the hanging part of my cupboard and it will have six drawers on full-extension runners. The aim of this piece will be to better facilitate my Marie Kondo-adopted tendencies and to make better use of the space. For this project I'm using two different thicknesses of plywood. I had them CNC cut to size. I haven't decided on the painting situation.
Project #5
I'll be building shelving racks in my garage on which to put crates. This eliminates crates being on top of each other that are hard to access. It is far easier to slide a crate off a shelf. I'll be using pallet planks for this project and I'm looking forward to the belt sander session.
I have this really super notebook with a pewter cover that a friend made for me years ago. It is my project book for my ideas, drawings and costings.

Project #6 is probably a tool holder. I have in mind a vanity-cabinet-style tool holder that can be carried and opened like a book to display arranged tools inside, on each side. I haven't got a work bench or workshop so my tools need to be able to move around where ever I'm working. I really don't like toolboxes. I'll try to create a mobile, workshop-wall pegboard.
My aim with these home projects is to use different types of wood materials and to try different techniques. They're all practical experiments that create useful items.
In the last few months, I've become a whiz with a drill and pretty proficient using a jigsaw and sander.
As my skills have improved, so has my confidence.
This past weekend I put wheels on a cupboard I brought home from my ex-office and wheels on an old cabinet that was in the shop at the factory but that I'm now going to use in my home office. I also replaced the old wheels on my gas heater with new ones better suited to the job. I drilled metal for the first time.
I haven't done a lot with drilling holes in walls to mount fixtures so I still find this a bit intimidating. Last year I installed kayak racks in my garage. It went really well and worked perfectly. This weekend, I installed a rack-and-hook set from the Garage Guys to assist in better organising my garage. A breeze.
I am really enjoying these woodwork projects - planning and executing. Measure twice. Cut once.
No comments:
Post a Comment